
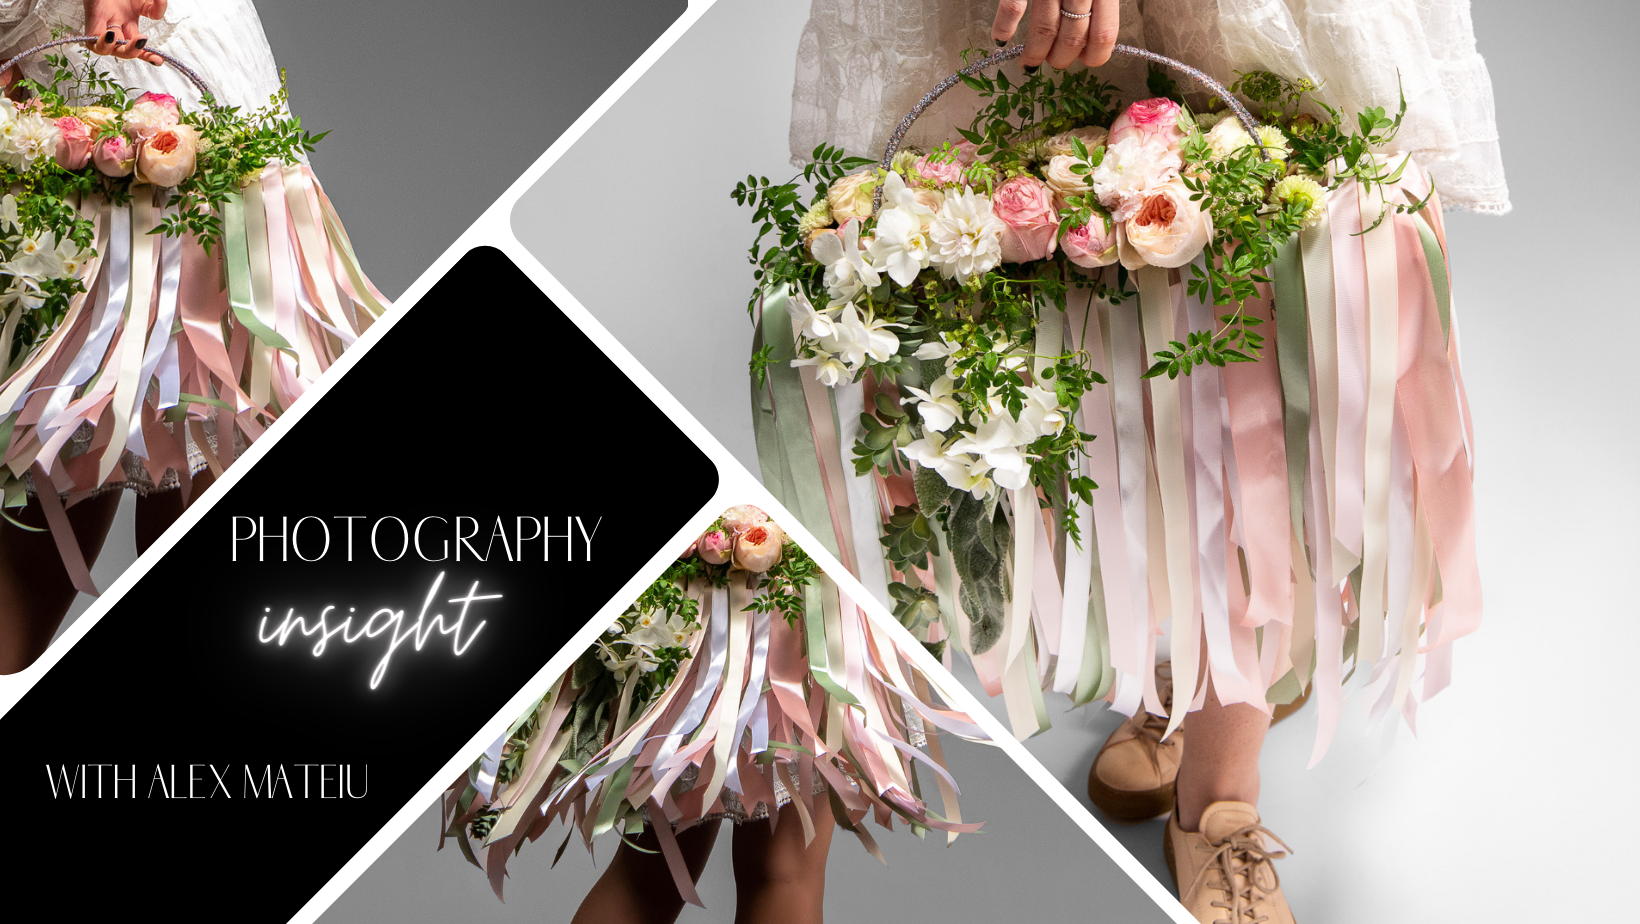
Photography insight
Sep 27, 2022How to enhance your floral design photography?
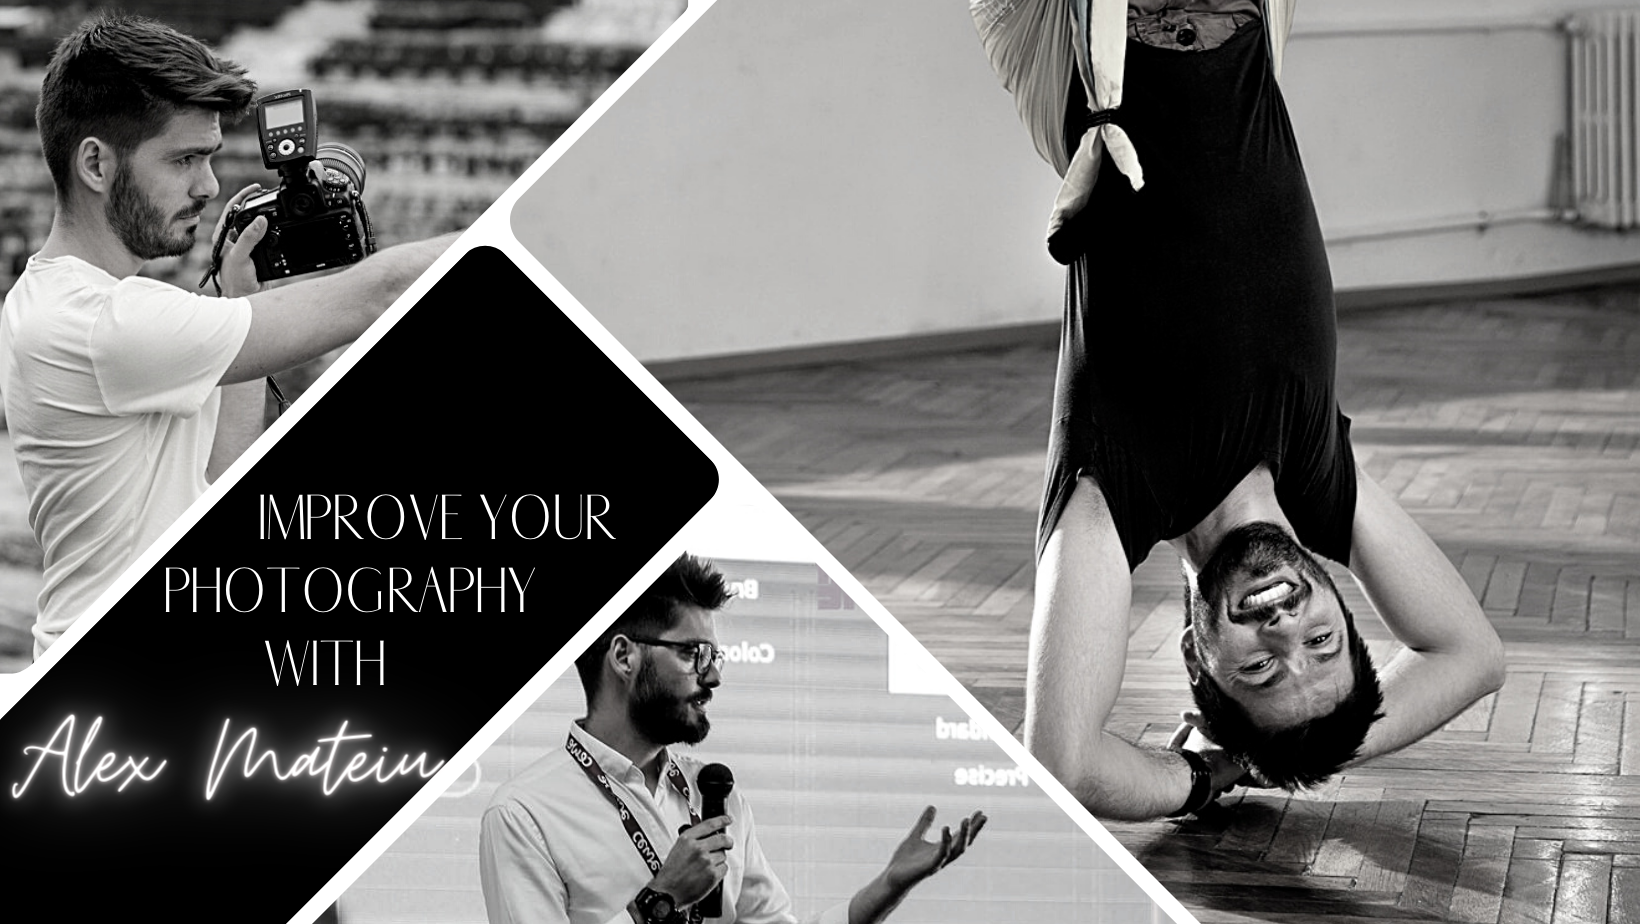
One on one with professional photographer Alex Mateiu
The Circle Community is a space of learning where everyone involved can contribute, either with questions or answers, ideas or new concepts, by encouraging others or by being active.
A while ago, our very own EMC designer, Coral Shortt EMC asked a really good question: "So with the world being so small due to online apps etc - and thus sharing of our work is almost as much online as it is in person these days. Talk to me about capturing your work - as a brilliant design can appear less than brilliant if not well captured/lit/edited/composed. And with the increase of virtual competitions, where 1 image is submitted, it's vital that 1 image is taken well (with no editing allowed to avoid photoshopping of a design, rather than just editing for light/colour, etc to overcome an amateur image). Short of knowing or hiring a photographer for every piece of work - what tips can each of you share to capture your work on a smart device or a real camera that can help us amateur but passionate designers capture our work better!"
So we thought, why not ask a professional photographer for tips and tricks... and maybe ask more? Alex Mateiu is a collaborator of EMC and Tomas De Bruyne he is a professional photographer for 15 years now and was a guest of the EMC Go Live Event last year. You can read more about him and his collaboration with EMC on our blog or you can listen to him in an interesting podcast with Anahit called Power Of Photography Alex Mateiu on Viva La Flora Live - The Art and Business of Flowers,
If you're a florist and want to capture the beauty of your floral arrangements, it can be easy to get frustrated with the results. You may feel like your photos don't do justice to your work or that they don't look as good as other people's. During the 3 days event on our Circle Community, we've had people asking questions related to photography, and Alex Mateiu has joined us for a discussion and we went through all of the questions asked, organising them is such a manner that we respond to all, as some questions were asked twice because the topic of light source or backdrop is one that concerns more people.
BACKDROP
The recommendation for the backdrop is to generally go for a neutral colour. In professional photography, we refer to the ideal backdrop as the 18% GREY. One of the most important and useful aspects of all photography is that 18% grey is part of photography's DNA, and now that we've left film to digital, it still reigns and dominates much of the photographer's world about exposure control. By definition 18% grey is the “mid-point between black and white on a logarithmic or exponential curve.” Think of it this way; it is halfway between black and white. It is the average in terms of scene brightness and has for many years been the one constant thing that photographers use on which to base their exposures on. It is an absolute neutral grey and simply put, if you light a backdrop in this grey it will become white in the picture, while if you light the object you photograph and distance the light source from the background, it will become black. This grey is available as a paint and it is easy for anyone to paint a wall or a plywood in this tone so that they can use it as a backdrop, just as there's always the option of buying ready made photography backdrop paper in this particular tone.
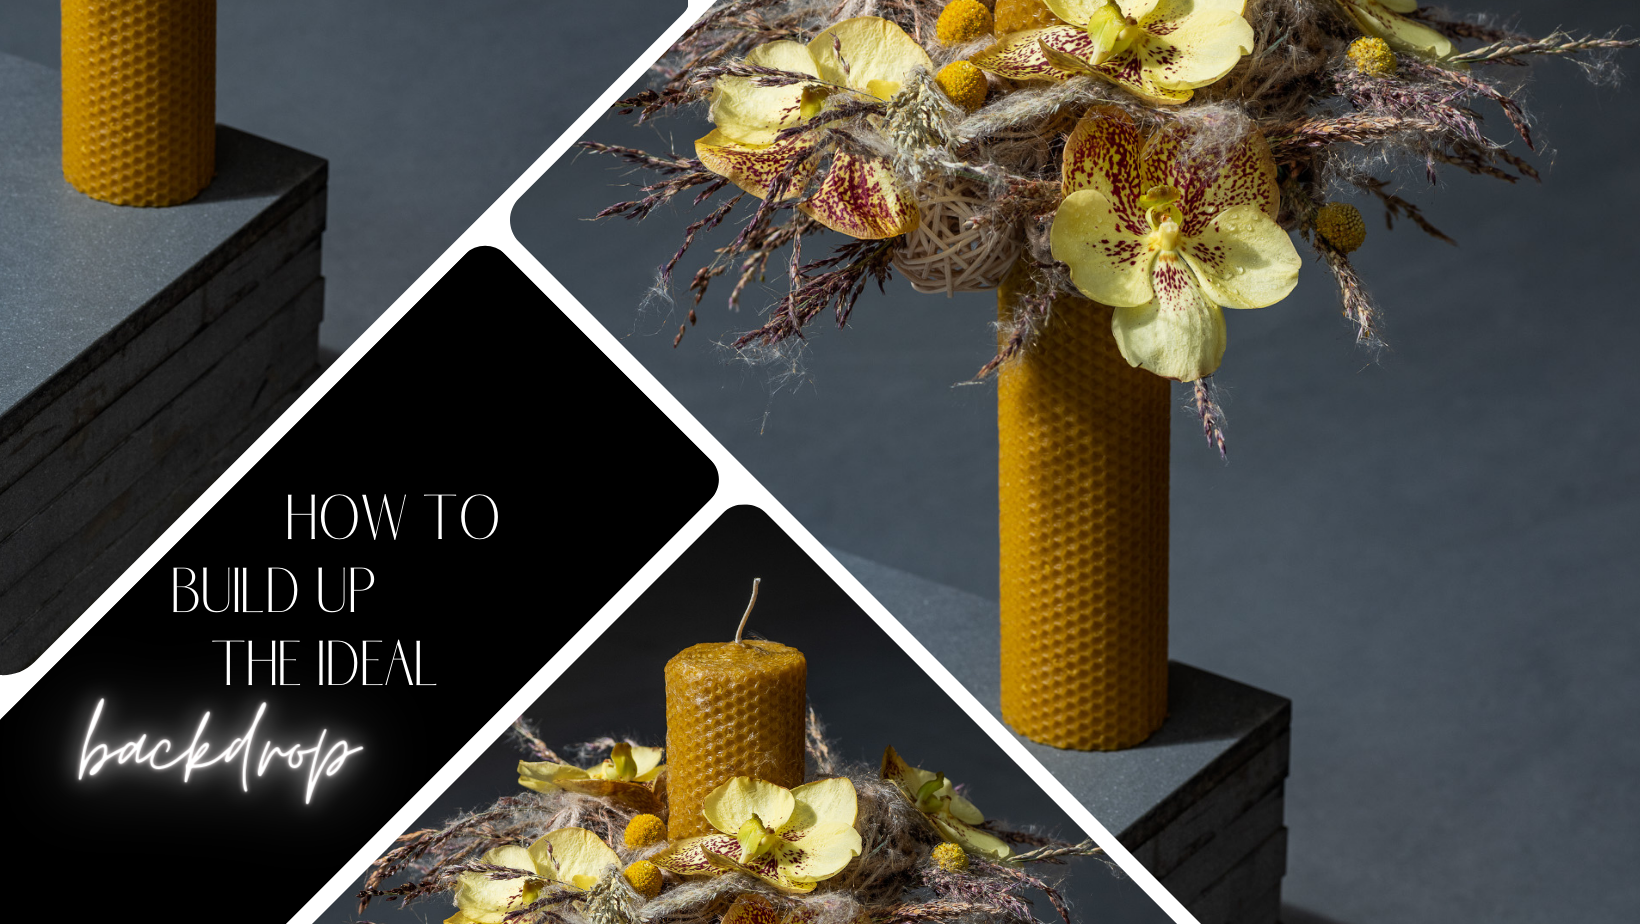
However, in photography our focus should always be on the subject of we are taking the picture, in this case the floral arrangement. This is why the eye of the photographer has to adjust to the situation and what the subject offers, and as in any form of art, there's no recipe to follow, but rather guidelines to help you. If there are a lot of, let's say, aluminium wires in the arrangement, the grey background wouldn't be my first choice as it is not going to show the emphasis on that particularity of the arrangement, since the greys in the picture will tend to merge in the picture and become less visible. In case like this, you can go for a contrast with the backdrop, and use a light pastel coloured backdrop for instance.
In any case, especially for people who are not professional photographers, my advice is to keep the backdrop CLEAN and with as little patterns and reflections as possible. This will allow you to focus on the subject, the florals, entirely and makes the job easier.
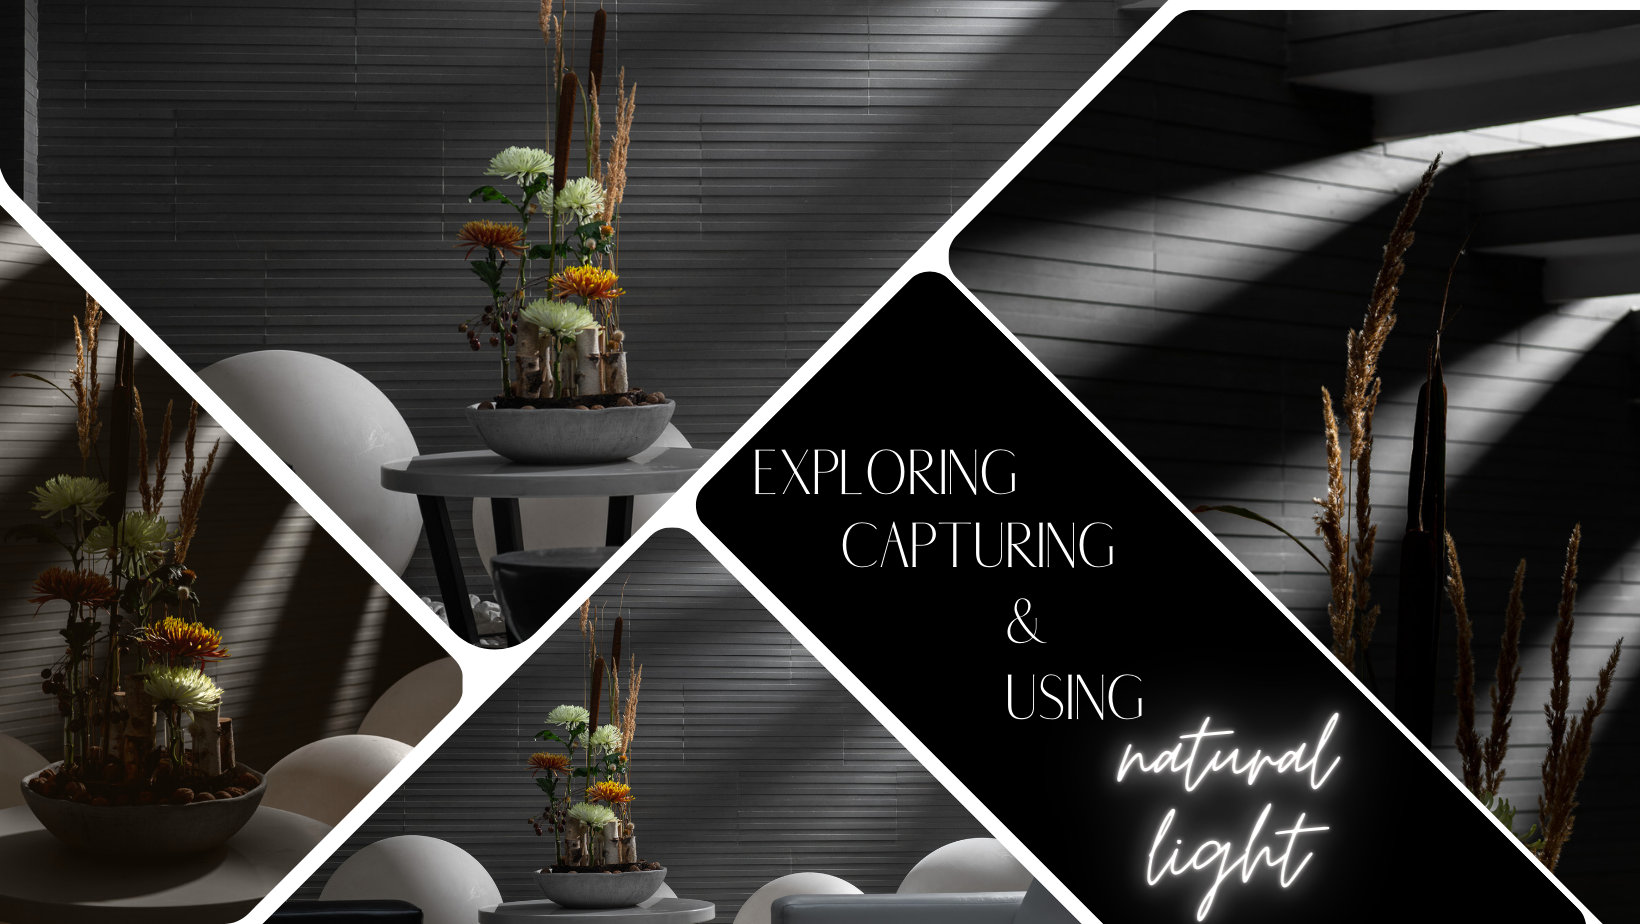
LIGHT SOURCE
The easiest light source and cheapest available on the market, so to say, is the NATURAL SUN LIGHT. It's available everywhere on the planet and it doesn't cost a thing. It does, however, involve a bit of knowledge in how to use it in order to get the best out of it. Using the sun light always takes care of one major issue, which is the angle in which the light hits the object, With the sun, it's always going to be at an angle between 0 and 90°m and that is happening by default, as it is determined by the position of the Sun and the shape and spinning of Earth. So that's one thing to worry about less when photographing.
To elaborate a little bit, if you do have a professional photography light source (artificial) the position of the light is also important, as in that situation you can control the light and place it so it hits the subject from below the line of the horizon, which is a very un-natural way to light up subjects. Meaning the human eye is not used to that way of lighting. And it's not to say it cannot achieve amazing results, but it definitely requires a bit of experience. Placed that way, light creates a more dramatic effect and can highlight different aspects of the design in a way natural light never will. Experimenting with a photography light source is something I advice people to do because it increases options, but only after they are confident in photography done in natural light. It will make the journey smoother as it trains their eye to see light as a photographer. I have covered the artificial light source phone photography in the video we have put together for the Circle Community.
For pictures taken inside using sun light, the focus has to be on identifying the light source and placing the subject in the ideal spot. To simplify things, when setting up for a photo session, the strongest beam of light has to drop on the subject you are photographing and to achieve this, especially for people who do not have a lot of experience in photography, there's a simple way to help find that spot and train your eye to see it at the same time. Blocking all windows except one, whether you improvise and use like a piece of carton or fabric, or you go for the more professional light blocking drapes, it's up to you. Either way, the purpose is to isolate on single window/door where the light enters the room. While placing the object, consider and observe where the light hits and try to adjust it best there. And don't forget to always control your position through the camera or phone lens, as the way things look in the camera are always different than you perceive them in reality. So double check and adjust your subject's position in a manner that light best compliments it.
When photographic outside in natural light, things get a bit more tricky. Strong, direct natural light comes with a strong sharpness to it, and therefore it is very good for capturing textures, for instance. However, this type of light also creates strong contrasts, so if a design has yellow or white it in it next to darker colours, it is most likely that a beginner will have difficulties adjusting the settings so that the light colours are visible without turning the darker colour into utter black. It is why I recommend that people with less experience use a place with more shadow or half shadow to take pictures. The softness of the sunlight in such places makes it easier to capture more information in the picture.
There is a natural progression of understanding and using natural light that comes with experience, so practicing as often as possible and taking pictures by consciously being aware of your light will change the way you will use it in time.
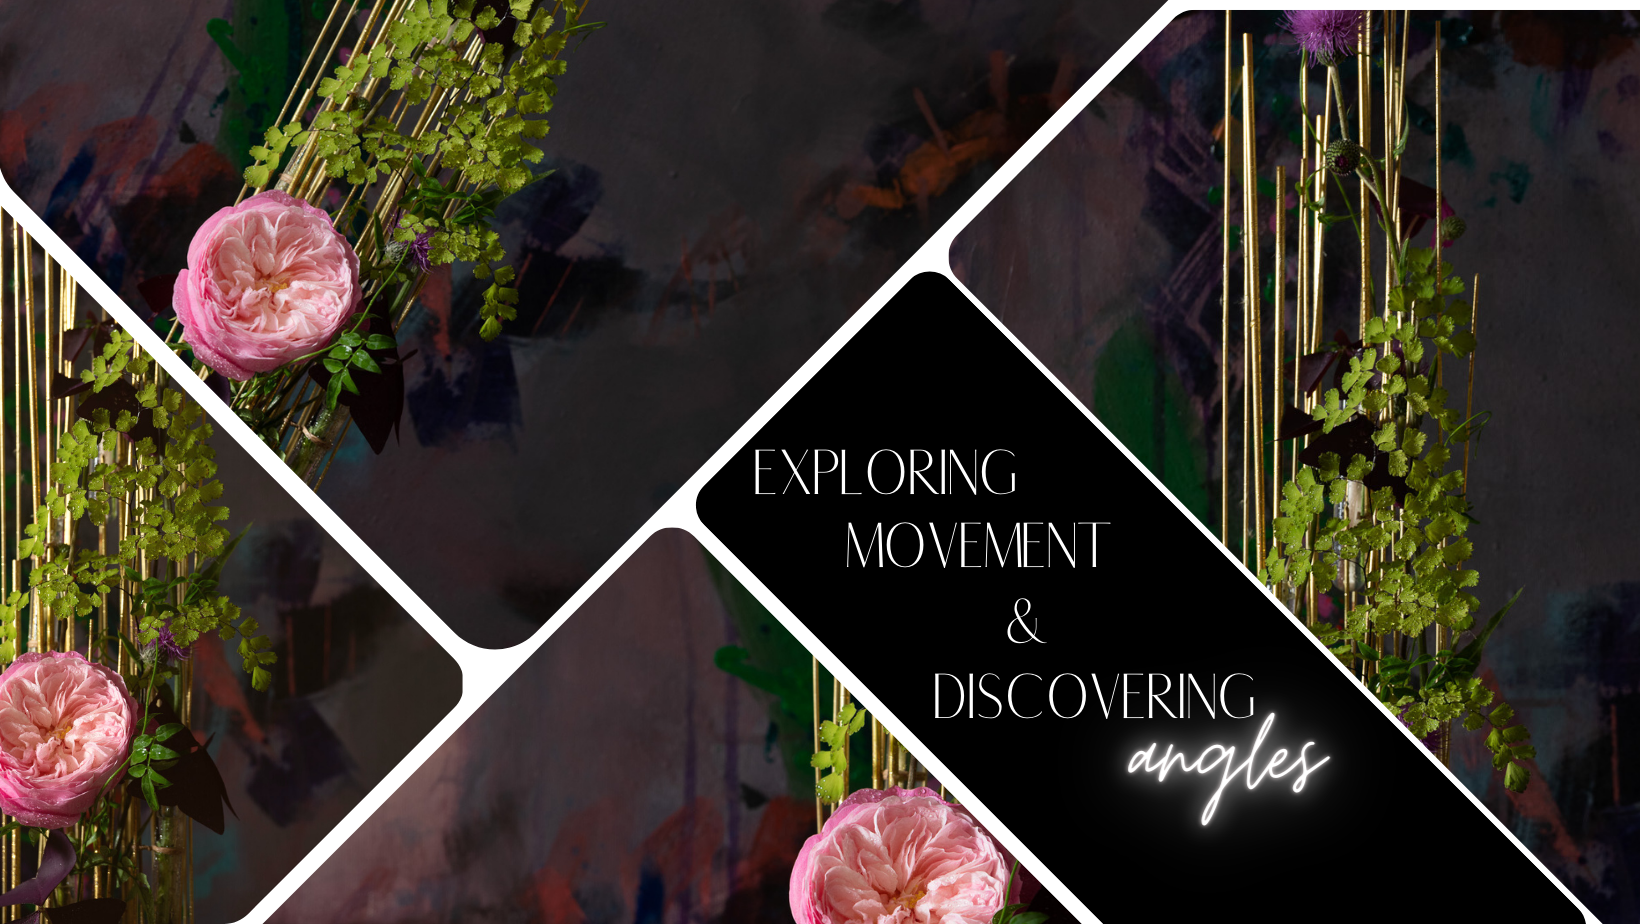
ANGLES AND POSITIONS
One of the biggest mistakes beginners do is that they don't move their subject or themselves around the subject. There is no such thing as a best angle. As a photographer you have to search your angles, you have to turn and move your subject. Also, you have to move as well, go closer, go further away, move constantly and try new angles. As it happens with photography, the camera lens will make you see your arrangement with the input of an objective observer. So you might be surprised sometimes on the images you take, especially if you try different approaches. People often think they make a setup, they lay their subject and they take a picture from the front and that's it. It doesn't work like this... in photography, movement is important. Trying out diverse angles will train your eye and in time you will be able to anticipate optimal angles.
EDITING
My recommendation for single editing is an app called Snapseed. It offers tools that allow you to save set-ups that can later be used on other pictures as well and I find it easy to use. However, if one has to work on a batch of pictures captured in the same place and light, Lightroom is a much better tool as it can work with multiple pictures at once. Editing is a whole different aspect of photography and it requires knowledge and experience so for beginners I do recommend that they keep the editing to a minimum. Their focus should be on getting the picture as close as possible to the desired outcome from the camera and use only small adjustments of brightness or contrast of the editing tool. Using too many filters or applying too many modifications on a shot from editing tools can easily transform the picture into a bad one. Editing the picture, if you want, is sort of like using make up, you want it to add value to the image, but not over due it as to steel the attention away from the subject. The more you focus on capturing the pictures right from the beginning, the less editing they will need and that makes the job easier.
On important aspect of editing though is actually editing the frames you take. I think many beginners tend to take a tone of shots to make sure they get that right one. Editing your raw material, meaning taking out and deleting what is not framed correctly or shots where colours are off, where movement creates blurs and so on is a valuable excercise that will in time train your eye. This will reflect in the way you position your camera, your subject into the frame and in time it will lead to a more efficient way of taking pictures, where a lesser number of good shots will result after a shooting, which is actually an ideal one should aim for. It's less time consuming and, also important, less space consuming on your hard-drive, phone or dropbox.
On our Circle Community, in the Resources are, we host a video of Alex Mateiu doing practical demonstrations on how to use and control artificial light source in a studio and work with only your phone to take pictures. It's an in depth video that will give you a lot of information and many practical advice. The video was aired during the 2021 EMC Go Live Event, and we offer it to our community as a resource.
interview by Diana Toma, EMC
photos by Alex Mateiu
Don't miss a beat!
New blogs, course offerings and what we are up to delivered to your inbox!
We hate SPAM. We will never sell your information, for any reason.
